IP Sculpture

You need photorealistic renders for a sculpture proposal — what is the actual workflow behind them? It is a question that comes up constantly on r/3Dmodeling, r/sculpture and r/Architecture, where both buyers and makers ask how realistic a 3D sculpture visualization can be before fabrication begins. The short answer is: very realistic, but only if you understand what each rendering level can honestly deliver.
At Y Sculptures, rendering is the bridge between an idea and an approved, buildable design. It lets clients see a digital sculpture preview before a single kilogram of bronze or FRP is poured. This guide explains the full sculpture rendering workflow, the tools behind it, and how to use visualization to get projects approved faster.
A credible render does not start with software. It starts with reference gathering — photographs of the site, real measurements, material samples and the client’s brand guidelines. These references anchor the 3D modeling sculpture stage so the geometry reflects reality, not guesswork.
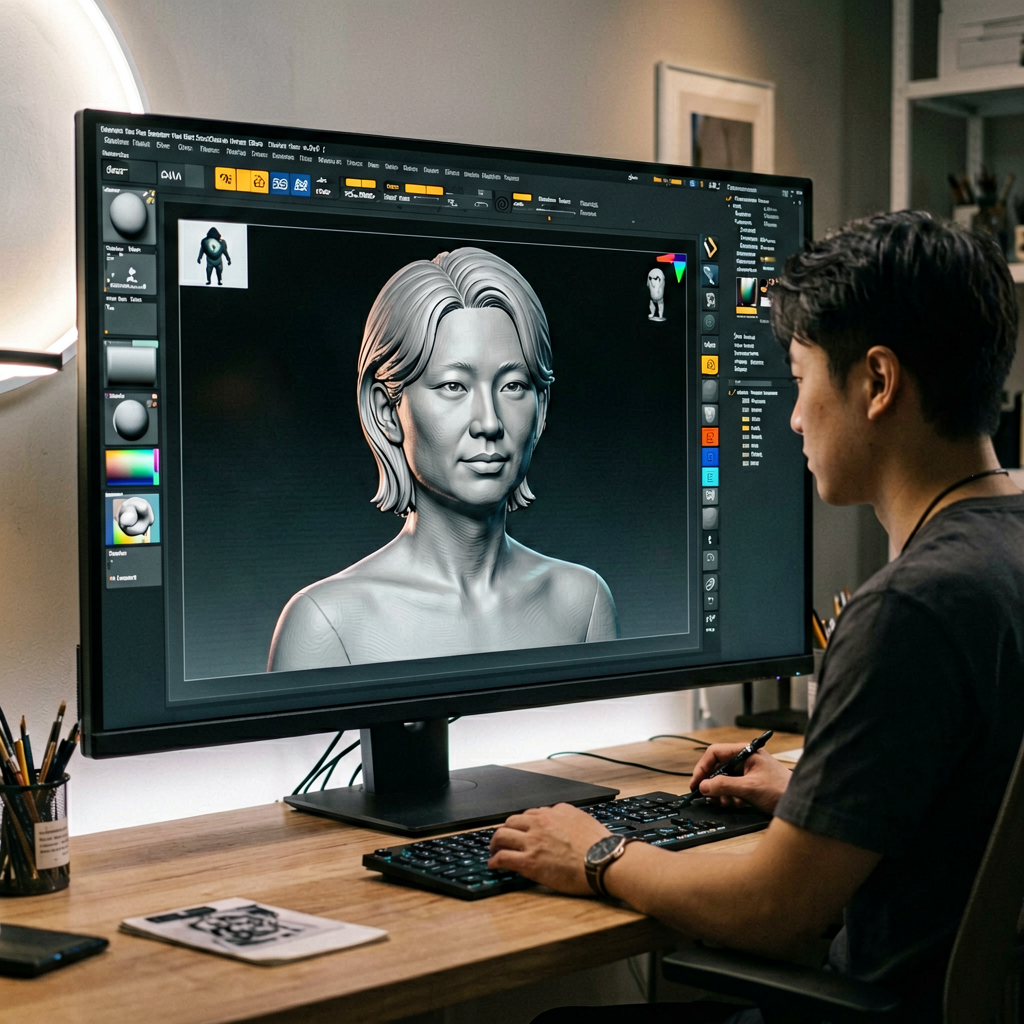
From there the model moves into digital sculpting tools where form, proportion and surface detail are shaped. Next comes material setup, where finishes such as bronze patina, mirror-polished steel or textured FRP are assigned to the surfaces. Lighting and a matching environment are then composed so the sculpture reads as it would on site.
Finally the scene is rendered with a physically based engine and finished in post-processing. Small color, contrast and depth tweaks turn a good frame into a presentation-ready image. This is digital sculpture rendering at its most effective — the point where raw geometry becomes an image clients can believe in. The whole loop is iterative, and expect several rounds of client feedback before the final digital sculpture proposal is locked.
Not every proposal needs a full photorealistic sculpture preview. Teams that over-specify renders waste time and budget. Here is how the four common rendering levels differ and when each one earns its cost.
A concept render is a style and composition study. It captures mood, silhouette and intent without chasing pixel-level material accuracy. Use it early, when the direction is still being debated and cheap iterations matter more than fidelity.
A technical render documents dimensions, viewpoints and scale against a measured backdrop. It is the drawing clients and engineers check for fit and clearance. This level is essential for permit submissions and structural sign-off.
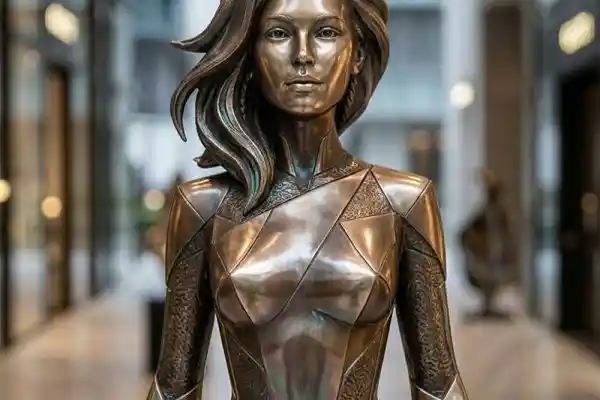
A photorealistic render adds true material behavior — how bronze oxidizes, how steel reflects, how FRP catches light. This is the level that wins client approvals because it shows what the finished piece will look like.
An environment render places the sculpture inside its installed context, complete with surrounding architecture, landscaping and people for scale. It is the strongest tool for helping stakeholders visualize the final result and is ideal for marketing and public presentations.
| Rendering Type | Primary Purpose | Fidelity | Best Use |
|---|---|---|---|
| Concept render | Style & composition study | Low | Early direction setting |
| Technical render | Dimensions & scale check | Medium | Permits, engineering review |
| Photorealistic render | Material accuracy preview | High | Client approval, sign-off |
| Environment render | Installed-context preview | High | Marketing, public presentations |
The right tool depends on whether you are sculpting organic detail, testing a sculpture mockup quickly or producing broadcast-quality imagery. Most studios combine a sculpting package with a dedicated renderer rather than relying on one program for everything.
ZBrush remains the benchmark for high-detail digital sculpture modeling, and it is the go-to for character and organic surfaces. Blender is a powerful free option that handles modeling, texturing and rendering in a single package, making it popular for teams watching their budget. KeyShot earns its place for fast, interactive material previews where speed matters more than ultimate fidelity.
For photorealistic output, V-Ray and Arnold are the industry standards. Both are physically based renderers that deliver the lighting and material realism clients expect in a final digital sculpture preview.
| Software | Best For | Cost | Learning Curve |
|---|---|---|---|
| ZBrush | High-detail digital sculpting | Paid | Steep |
| Blender | Modeling, texturing, rendering | Free | Moderate |
| KeyShot | Fast material & look previews | Paid | Low |
| V-Ray / Arnold | Photorealistic output | Paid | Moderate-steep |
The most common failure in sculpture rendering is not technical — it is expectation management. A photorealistic render shows an idealized version of the piece under flattering light. The finished sculpture will differ in small ways, and clients need to understand that gap up front.
Material finishes are the biggest variable. A render can show one shade of bronze, but real patination varies across the surface and between batches. Color accuracy on screen is also limited by monitor calibration, and the final piece will react to lighting differently than the simulated scene. Set these expectations early to avoid disappointment at delivery.
Our recommendation is to treat renders as decision tools, not contracts. Use them to confirm form, proportion, material direction and placement — then rely on physical samples and on-site approvals for the final call. This is the same discipline that makes sculpture design visualization genuinely useful rather than misleading.
Rendering delivers value across the whole project lifecycle, not just the design phase. For proposal presentations, a strong render is often the difference between a shortlist and a signed order. For client approvals, it replaces guesswork with a concrete image everyone can react to.
Marketers use environment renders in brochures, websites and social campaigns before the physical piece exists. Project teams submit technical renders with permit applications to demonstrate scale and structural intent. In every case, a clear digital sculpture proposal shortens the decision cycle and reduces costly rework. Browse our rendered projects to see how visualization supports real commissions.
Rendering is especially important when a design must satisfy multiple stakeholders. An architect, a brand manager and a facilities director all look at the same image and raise their concerns in one meeting instead of across weeks of email. That compression of feedback is why well-executed 3D sculpture visualization pays for itself quickly.
Rendering turnaround scales with the level of fidelity you need. A simple concept render can be turned around in two to three days once the model is approved. A full photorealistic render typically takes five to seven days because material and lighting work are detail-heavy.
Environment scenes are the most involved, usually taking one to two weeks to compose the installed context, populate scale figures and balance the lighting against a real site. Rushing this stage is a common mistake — it is where realism lives or dies.
| Deliverable | Typical Timeline | Relative Cost | Notes |
|---|---|---|---|
| Simple concept render | 2–3 days | $ | Style & composition only |
| Photorealistic render | 5–7 days | $$ | Material & lighting detail |
| Environment scene | 1–2 weeks | $$$ | Installed context & scale |
Every successful sculpture rendering project follows the same checklist. Gather references first, then model, assign real materials, light to the actual site and render at the fidelity the decision actually needs. Match the render level to its purpose rather than always chasing photorealism.
Communicate the render-vs-reality gap with clients from day one. Use renders as decision tools for form, proportion and finish, and confirm final choices with physical samples. When in doubt, ask for the photorealistic level — it is the one that wins approvals.
Ready to see your concept rendered? Explore our finished projects for inspiration, or review how original IP development relies on visualization to lock character designs before fabrication. For complex geometries, our 3D scanning guide explains how we capture existing forms digitally. When you are ready to move forward, contact our team with your sketches, measurements and site photos, and we will show you exactly what a rendering-driven proposal looks like.
David Chen is Design Director at Y Sculptures with 18+ years in large-scale sculpture design and fabrication. He specializes in FRP, stainless steel, and bronze sculpture engineering, overseeing design-to-production workflows for theme park attractions, public art installations, and brand IP mascots. David has personally directed over 300 custom sculpture projects for clients across 20+ countries.
Browse real projects matching this topic
Continue reading related articles
Explore our full range of custom sculpture services

Learn More →

Learn More →

Learn More →

Learn More →

Learn More →

Custom FRP and fiberglass sculpture manufacturer - design, fabrication, and finishing.
Learn More →
Custom stainless steel, bronze, corten, and aluminum sculpture manufacturer.
Learn More →
Custom Theme Park Sculptures – Bringing Imagination to Life Theme parks, amusement parks, zoos, and entertainment destinations thrive on immersive...
Learn More →
Custom Commercial Sculptures – Elevate Your Brand & Space In today's competitive retail and commercial environment, first impressions matter. Commercial...
Learn More →