FRP Manufacturing Process for Large Sculptures: Step by Step
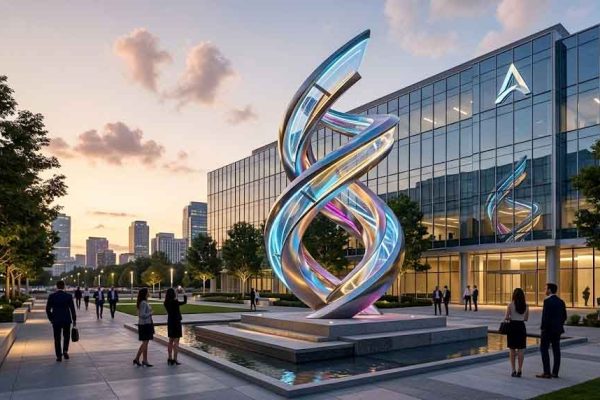
Fiberglass Reinforced Plastic (FRP) has become the material of choice for large-scale sculptures across public plazas, corporate headquarters, museums, and water parks, and other venues. Its combination of light weight, corrosion resistance, and design freedom makes it uniquely suited for monumental works that would be prohibitively expensive or structurally impossible in traditional materials. At Y Sculptures, our 50+ engineers and artists have refined every stage of the FRP manufacturing process over thousands of projects. This guide walks through each step, from initial design to final painting, and explains the material science that determines a sculpture’s longevity and visual quality.
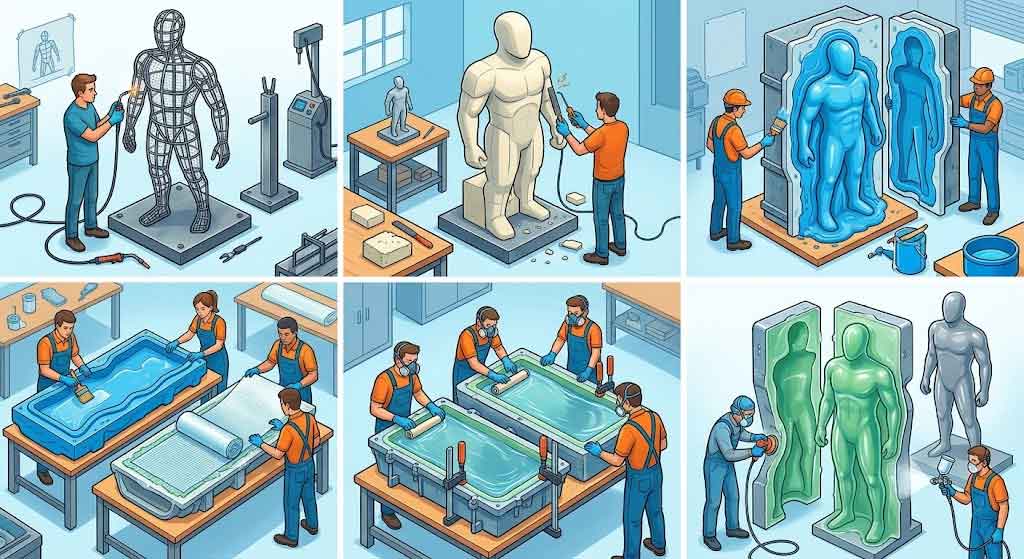
Step 1: Design & Engineering (1–3 Weeks)
Every large FRP sculpture begins as a conceptual design. Our team works with clients to develop 3D digital models using Rhino 3D, ZBrush, and SolidWorks — tools that allow us to simulate structural loads, wind resistance, and material distribution before any physical work begins. During this phase, the sculpture is divided into manageable sections (typically 2–4 meters in maximum dimension) to accommodate mold fabrication, transportation, and on-site assembly. A steel or aluminum internal armature is designed in parallel to provide the primary load-bearing skeleton that the FRP laminate will wrap around. For a complete framework on vendor selection and sculpture procurement best practices, our comprehensive buyer’s guide covers RFQ writing and supplier evaluation.
Step 2: Mold Making (2–4 Weeks)
Once the design is finalized, a master pattern is fabricated — usually from clay, foam, or CNC-machined polyurethane board. This pattern is an exact replica of the final sculpture. From this pattern, a production mold is created. For large sculptures, we typically use fiberglass-reinforced mother molds with silicone or epoxy gelcoat interiors. The mold is cut into sections that can be demolded individually, then reassembled for lamination. Quality at this stage is critical: every seam, texture, and surface detail on the mold transfers directly to the finished FRP part.
Step 3: Material Selection — Choosing the Right Resin
The choice of resin system determines the mechanical properties, durability, and cost of the finished sculpture. Three main types are used in large-scale sculpture work:
| Resin Type | Key Properties | Best For | Relative Cost |
|---|---|---|---|
| Polyester Resin | Good strength, moderate UV resistance, fast cure times, low cost | Indoor sculptures, temporary installations, budget-conscious projects | $ (baseline) |
| Epoxy Resin | Superior adhesion, excellent mechanical strength, low shrinkage, high UV resistance with proper additives | Outdoor monumental sculptures, marine environments, high-detail surfaces | $$$ (3–5× polyester) |
| Vinyl Ester Resin | Excellent chemical and corrosion resistance, superior fatigue life, good heat tolerance | Water features, chemically aggressive environments, high-stress structural zones | $$ (1.5–2× polyester) |
For most large outdoor sculptures, Y Sculptures specifies a vinyl ester or epoxy system for the outer structural layers, backed by a polyester tooling gelcoat for the cosmetic surface. This hybrid approach balances performance and budget. For a broader material cost comparison across FRP, stainless steel, and bronze, our detailed cost analysis breaks down the numbers per cubic meter.
Step 4: Hand Lay-Up & Lamination (2–6 Weeks)
The most labor-intensive stage, hand lay-up involves placing layers of fiberglass reinforcement (chopped strand mat, woven roving, or biaxial fabric) into the mold, each saturated with catalyzed resin. Large sculptures may require 8 to 15 laminate layers, with fiber orientation engineered to match stress vectors. For engineers evaluating fabrication methods, our detailed steel vs FRP comparison examines both approaches side by side. Core materials such as PVC foam or balsa wood are often integrated between laminate layers to increase stiffness without adding weight. Special attention is given to edge transitions, inside corners, and attachment points for the internal armature. The Aetheria digital avatar project exemplifies the precision required at this stage, where complex organic curves demanded highly skilled hand finishing.
Step 5: Curing & Demolding (1–2 Weeks)
After lamination, the part must cure at a controlled temperature (typically 20–30°C) for 24–72 hours, depending on resin chemistry and ambient conditions. For accelerated production, parts may be post-cured in an oven at 60–80°C to achieve full cross-linking and maximize mechanical properties. Once cured, sections are carefully demolded and moved to the finishing shop. Incomplete curing is one of the most common quality failures in FRP fabrication — it leads to warping, poor paint adhesion, and long-term degradation.
Step 6: Trimming, Assembly & Surface Finishing (2–4 Weeks)
Demolded sections have excess flash material trimmed away using diamond blades or abrasive cutters. The sections are then trial-fitted and bonded together using structural epoxy adhesives and additional laminate overlays on the interior seams. The assembled sculpture undergoes extensive surface preparation: pinholes are filled with body filler, seams are sanded smooth, and the entire surface is block-sanded progressively through 80, 120, 220, and 400 grit. For sculptures requiring ultra-smooth finishes like The Flowing Dimension, additional high-build primer coats are applied and re-sanded between coats.
Step 7: Priming & Painting (1–3 Weeks)
The painting process begins with a two-part epoxy primer that seals the FRP surface and provides a uniform substrate. For outdoor sculptures, we apply an automotive-grade polyurethane topcoat with UV stabilizers — this is the same coating technology used on aircraft and luxury yachts, offering 8–15 years of outdoor durability. Airless spray equipment is used for large uniform areas, while detail work is done with HVLP spray guns and hand brushing. Multi-color sculptures are masked and painted in layers, with each color baked at 60°C for 30 minutes to accelerate curing and improve hardness.
Quality Factors That Define a Superior FRP Sculpture
- Resin-to-glass ratio: Consistent 30:70 by weight ensures strength without brittleness or excess weight.
- Gelcoat thickness: 0.5–0.8 mm minimum for adequate UV protection without cracking.
- Laminate compaction: Roller-debulking every 2–3 layers eliminates voids and dry spots.
- Curvature continuity: No flat spots or abrupt transitions — every surface should flow smoothly into the next.
- Paint adhesion testing: Cross-hatch tape testing per ASTM D3359 on every color coat.
Timeline Estimates for Large FRP Sculptures
| Sculpture Scale | Typical Timeline | Example Dimensions |
|---|---|---|
| Small–Medium | 8–12 weeks | 1–3 m height |
| Large | 12–20 weeks | 3–8 m height |
| Monumental | 20–40 weeks | 8–20+ m height |
Conclusion
FRP manufacturing for large sculptures is a sophisticated process that demands expertise in materials science, structural engineering, and fine-art craftsmanship. Each step — from design through to final paint — directly affects the sculpture’s appearance, durability, and structural integrity. When sourcing a manufacturer, look for demonstrated competence across all seven stages, not just mold-making or painting alone. At Y Sculptures, our integrated team of engineers, mold makers, laminators, and master painters controls every variable in the process, delivering large-scale FRP sculptures that stand the test of time and the elements.